After one of my friends introduced me to the wonders of Home Assistant, I was eager to get started on it myself. I purchased a second-hand mini computer and set up a server to run Home Assistant. Together with two friends, we organized a sort of hackathon where each of us would work on our own projects. I decided to start with something simple: temperature sensors. Since I had limited experience with electrical circuits, messaging protocols, and C++, I quickly realized it was quite challenging. But that's how you learn, right?
After several prototypes, I ended up with a solution I was satisfied with. Then, I used Tinkercad to design a custom case to enclose all the electronics. One of my friends helped me by 3D printing the casings, and the end result looks like this:
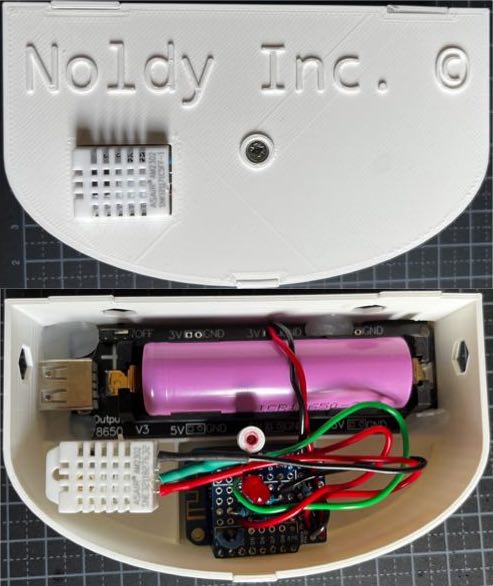
I created four identical climate sensors to measure temperature and humidity throughout the apartment. For each sensor, I used a Wemos D1 mini, a small microcontroller capable of connecting to WiFi. I programmed the controller to wake up every 5 minutes and perform a series of tasks.
- It connects to the WiFi network.
- It reads the current temperature and humidity from the sensor.
- It reads the battery voltage.
- It Publishes the data (temperature, humidity, and battery voltage) to Home Assistant using the MQTT protocol.
- It enters sleep mode for 5 minutes.
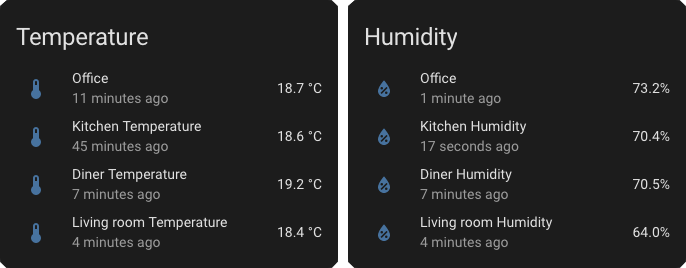
On my Home Assistant dashboard, the data is visualized as shown in the image below:
I also implemented an automation in Home Assistant to monitor the battery voltages of the climate sensors. Whenever one of the sensor's batteries is running low, I receive a push notification informing me which sensor needs to be recharged.